K, so Whitney Wreathmaker (aka my amazing and craft sister) brought this idea to Susie. You can get these plain white bathroom tiles at Home Despot for $0.13 apiece! That's right! 13 cents a piece! CRAZY!
1) Cut a picture (on photo paper) or nice scrapbook paper out to fit the size of the tile
2) paint a medium coat of mod podge on the tile
3) place the photo (or paper) down and adjust
4) smooth it out to get out any air bubbles
5) paint with another coat of mod podge
6) let dry for 20 min or so
7) repeat steps 5-6 about 4 times give or take
8) spray with a coat of glass-finish spray paint (it's clear)
9) LET DRY and ENJOY!!!
This is the best y'all! You must try it!!!
Love my sissy tons! Thanks Lauren!
Susie
Thursday, December 15, 2011
Wednesday, December 14, 2011
Ornament Wreath! MUST TRY!!!
Y'all...this is Susie's best project yet!
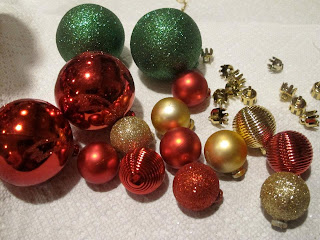
"She makes coverings for her bed;" -Proverbs 31:22a. The Proverbs 31 woman cares about the looks of her household. In an attempt to make our house a little more decorative, my sister (Whitney Wreathmaker) and I set out to make an ornament wreath. So far, I have made two of them.
It helps a lot if two people work on this togehter. Here is what you need.
-wire coat hanger
-tons of matching ornaments in all different sizes, but all round (get the cheapest ones you can find! We used Styrofoam ones :) )
-hot glue gun
-about 1.5 hours of time
-some pretty ribbon (just enough to make a bow)
Here are the steps...
1) Untwist the coat hanger and bend it into a circle (we bent ours around a big pot to get a better circle shape)
2) hot glue the tops of the ornaments (the little hanger things of the ornaments are really flimsy - hot glue them so they will be secure)
3) string on the ornaments trying to alternate colors
4) keep stringing
-at first it doesn't seem like it's going to work, but keep pushing them together, IT WILL WORK
5) after the whole circle is filled up, twist the hanger back together - use plyers!
6) use a ribbon to cover up the hanger part :) That's it!!!
PS - my ornaments took about 80 different ornaments each (though some of the ornaments were teeny-tiny)
You must try this!!!
Susie :)
Crayon Art!
So, I have been seeing this "Melted Crayon Art" all over Pinterest, so I decided to give it a shot. Here are the steps I took.
1) Paint canvas black
2) Lay out crayons then hot glue them to the top
3) Melt the wax with a hair dryer (please do it on low, the melted wax flies everywhere if you do the hair dryer on full speed) - (also, hold the canvas at an angle so the wax drips down, not out)
4) Let it dry mostly
5) Cut out a "T" (or anything really) with a knife
6) Paint back over the cut out with black :)
7) ENJOY
Sorry about the bottom of the picture. The uploader was acting funny. Just part of life :)
Melt it up!
Susie
Subscribe to:
Comments (Atom)


