Wednesday, November 30, 2011

T-Shirts!!! Who Knew?

After a fun trip to Walmart (I love Walmart!), I had a few t-shirts, and lots of ambition. My first craft was to make a purse/tote thing out of a t-shirt :D

 Start with a plain shirt :D
Cut the sleeves off, then cut the neck out

Once you have a shirt with no neck or sleeves, 1) make once slit in the hem at the bottom of the shirt (don't cut past the sewing). 2) Then attached a safety pin to a cute (matching) piece of ribbon. The slit will have opened up a tunnel for you. 3) Just feed the safety pin through the tunnel (the hem). When it comes out of the hole, undo the safety pin and 4) tie a cute bow :D This should cinch the bottom of the purse for you :D 

And there you have it!!!


After that exciting project, I tried out "watermarking" a shirt! You start with a plain white shirt. 

Steps:
1) Write anything you want on the shirt with regular Elmer's glue (some people say to wet the shirt first - I did not and it worked great)
2) Let it dry
3) Dye it! (I dyed mine in the dorm sink with R.I.T. dye)
4) Wash it (by itself!!! You don't want it to bleed on any of your clothes) - PS - I may or may not know this from experience...
5) Dry it and enjoy!!!


Stayed tuned for the Christmas watermarked shirt!!!
PS - If you don't feel like making a shirt, I'm selling mine :) Email me at tlj4165@gmail.com if you are interested in any of my crafts!

Love 
Susie

Sunday, November 27, 2011

Gobble Gobble - It's Susie's Favorite Holiday!

Naturally, a home-cooking lovin' Susie LOVES Thanksgiving! It was time to put my baking skills to the test! First up was a homemade key-lime pie. After juicing nearly 20 key limes (nearly impossible!) we mixed it up and had a yummy pie. That was easy :)

Then I made a German-chocolate cake. The cake part went off without a hitch. But then came the icing...After 3 attempts I was fed up. The first one burned. I scrambled eggs in the second. And the third was too runny. What would Susie do??? Just add corn starch and gelatin! Haha...as crazy as it sounds, it actually worked! Haha I love make-shifting :)

Last, I made two homemade pumpkin pies (follow the can recipe but double the spices - an old trick I learned from my Aunt Barb). I cannot claim homemade pie crust though. The Pillsbury kind is just too good :) I did have to figure out how to style it though...they turned out alright :)

After all of that, I was beat...and it was only Wednesday! Haha :) Thanksgiving was fabulous. I have so so much to be thankful for this year, and every year. It's hard to believe this Thanksgiving marks the two year anniversary of the start of my illness. God is so good to have pulled me through it all :)

Enjoy some pictures and happy baking!


 FAIL 1 - burnt
 FAIL 2 - Scrambled Eggs
 Fail 3 - runny...


Thanks!
Susie :)

Thursday, November 10, 2011

Don't cry over spilt milk...or under-baked bread...

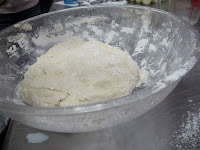
So, I set out on another bread making excursion. This time I was intent on baking sourdough bread from starter. Some sweet ladies at the church gave me starter after our bread making class. It took basically all day. Feed the starter, make the dough, let it rise, divide it up, let it rise more, bake it, and then eat it.

Let me tell you, baking in college is all about makin' do with what ya got. I couldn't put the bread in the oven with the light on for 3 hours to let the dough rise considering that the kitchen is all the way downstairs (plus, I don't really trust leaving yummies in the community kitchen unattended if you catch my drift). So, dilemma #1: how to find a warm spot where the dough can rise. How about by the window? Well...it's a chilly 45* outside...so that won't do. In the end, I put a damp towel over the bowl and set my heating pad on low heat over the top of it (true story). I wish I had a picture! It was quite a sight to see.

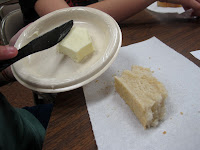
Finally, it was ready to bake. I sat in the kitchen as it baked. When the timer went off, I took it out and trekked back to my room. I was so pumped! I cut into the warm loaf of bread. And guess what??? It wasn't done :( Wah wah wah....At that point it was too late to take it back and bake it long since I had already thrown the loaf pans away. Now I know what under baked bread looks like! Another exciting kitchen lesson learned!

PS - My roomies still seemed to enjoy the half-eaten doughy mess sitting on our counter at the moment, so it wasn't a complete failure. Stay tuned for attempt #2!!!

Here are the pics anyways!


Happy baking!
Susie

Tuesday, November 8, 2011

I made bread...with yeast and everything!!!

My bread making class inspired me to make some all by myself. In my little dorm kitchen, I made the dough. I had to roll it out on our table because there wasn't enough counter space (gotta love college). Anyways, it was a blast. I took the finished pecan cinnamon rolls to my bible study. They gobbled them up! So, my first attempt at real from scratch cinnamon rolls was a success!!! Enjoy :) I'll post the recipe just under the pictures!


Homemade Cinnamon Rolls with Classic Yeast Bread Recipe

1 cup milk
1/4 cup shortening
1/2 tbsp salt
2 tbsp sugar
Heat those in microwave until shortening melts

Dissolve 1 pkg yeast in 1/3 cup warm water (hot water will kill the yeast) with 1 tbsp sugar. (I used quick rising yeast)

Place milk mixture in bowl. When luke warm add yeast mixture (again, if it's too hot it will kill the yeast)
Add 1 egg - mix well
Add 2 cups flour - mix on medium speed for 2 minutes
Add 1.5-2 cups flour until it makes a still dough (shouldn't be sticky) (I got my hands dirty on this part!)

Grease a large bowl- place dough in it and turn over to grease top. Cover with saran wrap and a damp towel. Place in a warm place to rise til double in size.

Roll out into a rectangle on a floured surface. Cover with melted butter. Sprinkle cinnamon/sugar (I added pecans). Roll up (roll it really tight). Cut into 1" slices. Place these on a greased pan (not to close). Cover again and let rise.

Bake in a 400-425* oven 15-18 minutes until golden brown.

ICING: powdered sugar, milk, vanilla

Note: the dough also makes great dinner rolls!

ENJOY! Love
Susie

Thursday, November 3, 2011

Susie Homemaker and Betty Breadmaker!

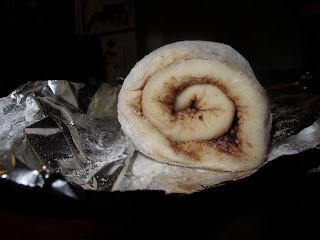
Tonight at my church (Lakeview) there was a college girls bread making class! That was just the place for Susie! So, Betty Breadmaker (Emily Neill) and Susie Homemaker (me) went and had a wonderful time! We learned how to make sourdough as well as yeast bread :) We made the yeast bread into cinnamon rolls and the sourdough into loaves.

Also, there was a raffle! Guess who won...??? Betty won a loaf of fresh homemade bread! And Susie won some cinnamon rolls to bake!!!


So, naturally, when I got back to the dorm, I ran to the kitchen and baked my cinnamon rolls. I even made homemade powdered sugar glaze! I ate a few, my roomie ate one, and I gave one to a friend in the kitchen. But obviously, there was a lot left. But then...Susie (not me :P ) got a little carried away...and oops...

 FAIL

In the end, I learned how to make bread...and had a great laugh!

Have a good laugh!
Susie :)

Wednesday, November 2, 2011

Vintage Birdy Art :)

I saw a cute use for old worn out books, so back to the Salvation Army I went. For $1, I got 4 old musty gross books (the yellowed pages look awesome for the project). After some mod-podging I had a lovely background to trace some birds on to. After filling in the birds with black paint, I have a lovely new art piece! Enjoy!


 The white birds here are just cut outs of notecards that I drew, cut out, then used to trace the birds on to the canvas before painting.

Chirp Chirp
Susie :)